“Progressivism” is, as Fish notes — and as I’ve spent years on protein wisdom demonstrating through my various discussions of identity politics and language — a belief system that, once its kernel assumptions are adopted, will lead fundamentally and inexorably to tyranny. Fish doesn’t call it such, of course. He chooses “might makes right.” But there is no difference. Tyranny and authoritarianism — when lorded over by the “liberal” — is, by virtue of the adopted morality of those running it, both moral and good.
Saturday, April 7, 2012
Stanley Fish - Authoritarian - Progressive
If Stanley Fish is a typical "progressive", then apparently being "progressive" and being "authoritarian are not substantially dissimilar positions. Via Protein Wisdom -
Friday, April 6, 2012
Shane
Originally titled "Ultimate Proof That The Ruskies Have Taken Over Yale", this quilt was made for one of our daughter's former boyfriends. Shane had studied Russian while at Yale and even made a trip to Russia a few years back. He remains a really decent person. We wish him well wherever life takes him.
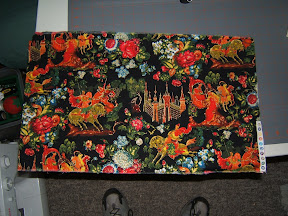
We came across a series of quilting fabrics that had a Russian theme. The four fabrics are shown below. Click for a larger picture.
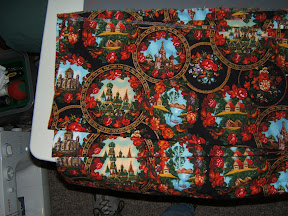
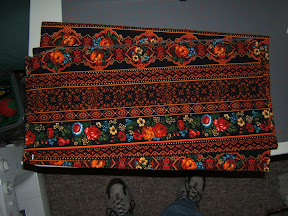
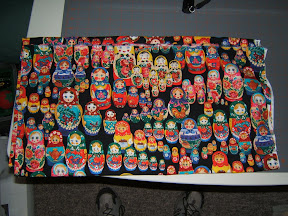
The only problem with buying such fabrics is that you eventually have to find a project where you can use them. Enter our daughter's significant other. Shane is a nice young man on scholarship to Yale who also has an interest in Russia. He reads a lot of Russian novels and for a while was attempting to learn to speak the language. He's even been to Russia as part of a Yale program.
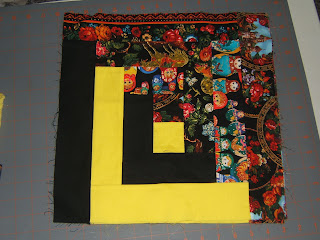
So now that we have a connection from the fabric to a person, we had to fill out the colors for the log cabin pattern. As it happens, Yale operates on a college system. There are colleges within university that have their own separate colors and traditions. You should be able to figure out Shane's college colors from the completed block sample.
My boss's wife is a quilter. He frequently accuses her of cutting up perfectly good material into tiny pieces only to sew it back together into a quilt. Apparently, I'm guilty of that sort of thing.
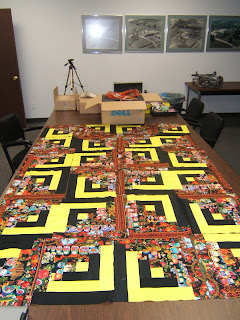
Once we have all of the modestly garish panels completed, then comes the task of figuring out how to arrange them into an interesting pattern. We opted for the following layout because it reminded me of a Slavic wall hanging that used to be in my grandparents house above the fireplace.
Unfortunately, we gave Shane the quilt for Christmas before I could get some photos of the finished product. So I assigned our daughter to a secret agent mission to obtain the forgotten photos.
In honor of Shane's studying at Yale, I had the lady that quilted the quilt....that's how we say it....stitch a block letter "Y" in the middle of each block. The back is a black sheet. Honest! The flash must have washed out the sheet.

And here is the whole thing. Sadly, Shane is apparently too shy to appear on my blog. Given what else gets posted here, I can't say that I blame him.

The final quilting was done by The Village Quilter in Grass Lake, MI. Give Sue a call if you ever have need of a professional quilting services. (517) 206-5154.
We came across a series of quilting fabrics that had a Russian theme. The four fabrics are shown below. Click for a larger picture.
The only problem with buying such fabrics is that you eventually have to find a project where you can use them. Enter our daughter's significant other. Shane is a nice young man on scholarship to Yale who also has an interest in Russia. He reads a lot of Russian novels and for a while was attempting to learn to speak the language. He's even been to Russia as part of a Yale program.
So now that we have a connection from the fabric to a person, we had to fill out the colors for the log cabin pattern. As it happens, Yale operates on a college system. There are colleges within university that have their own separate colors and traditions. You should be able to figure out Shane's college colors from the completed block sample.
My boss's wife is a quilter. He frequently accuses her of cutting up perfectly good material into tiny pieces only to sew it back together into a quilt. Apparently, I'm guilty of that sort of thing.
Once we have all of the modestly garish panels completed, then comes the task of figuring out how to arrange them into an interesting pattern. We opted for the following layout because it reminded me of a Slavic wall hanging that used to be in my grandparents house above the fireplace.
Unfortunately, we gave Shane the quilt for Christmas before I could get some photos of the finished product. So I assigned our daughter to a secret agent mission to obtain the forgotten photos.
In honor of Shane's studying at Yale, I had the lady that quilted the quilt....that's how we say it....stitch a block letter "Y" in the middle of each block. The back is a black sheet. Honest! The flash must have washed out the sheet.
And here is the whole thing. Sadly, Shane is apparently too shy to appear on my blog. Given what else gets posted here, I can't say that I blame him.
The final quilting was done by The Village Quilter in Grass Lake, MI. Give Sue a call if you ever have need of a professional quilting services. (517) 206-5154.
Thursday, April 5, 2012
Tuesday, April 3, 2012
Gavin
Here is one quilt that I was especially pleased to complete. Not only was it for some good friends, but it also presented a unique challenge. From 2008 we bring you another bit of quilting history.
I was pretty excited to get this next quilt done for a variety of reasons.
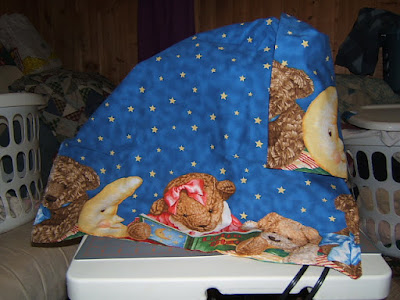
One reason is because of the material I used. The pattern of the material included a series of teddy bears, books, and smiling moons that looked a bit like a stuff set up on a child's shelf. This pattern ran along one edge. Above all the clutter was a broad expanse of deep blue with yellow stars. Then the bear/book/moon pattern ran along the opposite edge. You could fold this material down the middle and both sides looked the same.
Silly me, I took a perfectly good material pattern, cut it into strips, and sewed it back together.
The first cut was along each edge. I used those strips for the outside of the block.
The next cut was through the bears. That got used for the next strip towards the center.
The third cut went through the top of the bears. At that point, I started to get some of the stars and the night sky.
The fourth cut was mostly stars, but with enough bear head tops that I just put it in the scrap pile. That left a whole bunch of blue sky and stars from which I made the other half of the blocks.
Here's a picture of the material with the first cut already removed. I used all of the edges for the quilt. There's lots of other stuff left over.
The second reason I was excited about this project is the stitching used to "quilt" everything together. I was getting kind of bored with just running straight lines down the seams....otherwise known as stitch-in-the-ditch....as well as straight lines across the corners.
To ease my boredom, I bought an 18" wooden embroidery hoop and a chalking tool. I used the chalking tool to trace the inside of the hoop. I then connected each of the circles by drawing in a line tangent to each adjacent circle. Once that was done, it was pretty easy to stitch the cloverleaf/Celtic knot pattern that you should be able to see in the picture below.
Here is the hoop and chalking tool.
Monday, April 2, 2012
Blowing In The Wind
As a part of checking out a number of kinetic sculptures, I came across this interesting piece of work. If you feel the need, you can purchase one here.
Sunday, April 1, 2012
Subscribe to:
Comments (Atom)
